3.27Define Sections
Cross-section properties of all members are defined using the Define/Sections command and then assigned to the different members using the Process/Member Types command.
•From the Define menu, select Sections. The dialog box of Figure 3-14 appears.
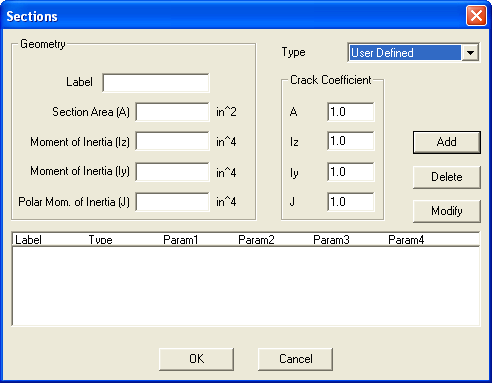
Figure 3-14 Sections dialog box
•Open the TYPE list box and select a section type from the drop-down list. Available sections are user defined, rectangular, circular, T-section, and L-section. The remaining text boxes change depending on the section type selected.
•Enter a section label in the LABEL text box.
•For a USER DEFINED section, enter the area, moment of inertia about the local z axis (Iz), moment of inertia about the local y axis (Iy) and the polar moment of inertia of the section (J), in the corresponding text boxes.
•For a RECTANGULAR section, enter the width (along the local z axis) and depth (along the local y axis) of the section in the corresponding text boxes.
•For a CIRCULAR section, enter the diameter of the section in the corresponding text box.
•For an L-SECTION section, enter the flange width, flange thickness, web width, and web thickness in the corresponding text boxes.
•For a T-SECTION section, enter the flange width, flange thickness, web width, and web thickness in the corresponding text boxes.
•For any type section you select, input the cracked section coefficients in the CRACK COEFFICIENT group text boxes. You can input coefficients that will be multiplied by the area, moment of inertia Iz, moment of inertia Iy, and polar moment of inertia, J. The values entered must be between 0 and 1.
•Choose the ADD button or press ENTER. The data entered are added to the list box at the bottom. Note that the cracked section coefficients will not be shown in the list box, however, their values are saved by the program.
•Repeat the steps above for each section entry you have, making sure that no duplicate labels are entered.
•To edit an entry that has been added to the list box, select that entry from the list box, modify its values in the text boxes, and choose the MODIFY button.
•To remove an entry that has already been added to the list box, select that entry from the list box and choose the DELETE button.
•Choose the OK button.