5.30Group Members
•From the Assign menu, choose Member Group. The modeless dialog box of Figure 5-23 appears. To end member group assignment, choose the CLOSE button.
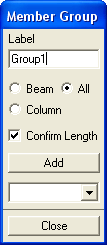
Figure 5-23 Member Group dialog box
•In the LABEL text box, enter a group label.
•Specify whether the group should include beams only, columns only, or any member, by selecting the corresponding option.
•Specify whether the program should check to make sure that grouped members are of the same length or not by checking or clearing the CONFIRM LENGTH check-box option, respectively.
•Choose the ADD button. The group label is added to the drop-down list.
•Repeat the three steps above until all groups are defined.
5.30.2Adding Members to a Defined Group
•From the drop-down box, select a group.
•In the Graphics area, using the left-mouse button, marquee select the members to be included in that group. To remove a member from a group, do the same using the right-mouse button.
Note: It may happen that some members are selected to be grouped and only a few of them are shown in red. This indicates that the selected members do not have the same length (with the CONFIRM LENGTH option ON), or they are of different types (beams in a column group or vice versa).