Building Code Requirements for Structural Concrete (ACI 318-19) and Commentary (ACI 318R-19)
• spColumn Engineering Software Program Manual v10.00, STRUCTUREPOINT, 2021
• “Interaction Diagram - Tied Reinforced Concrete Column Design Strength (ACI 318-19)” Design Example, STRUCTUREPOINT, 2022
• “Interaction Diagram - Circular Spiral Reinforced Concrete Column (ACI 318-19)” Design Example, STRUCTUREPOINT, 2022
• “Interaction Diagram - Tied Reinforced Concrete Column with High-Strength Reinforcing Bars (ACI 318-19)” Design Example, STRUCTUREPOINT, 2022
• “Interaction Diagram - Building Elevator Reinforced Concrete Core Wall Design Strength (ACI 318-19)” Design Example, STRUCTUREPOINT, 2022
The reinforcement size and location selected for this shear wall are shown in Figure 1. Detailed bar and concrete shape data are tabulated below.
Note: Layer 1 and 2 are in the retaining wall section (Tee flange)
Layer 33, 34, and 35 are in the building column section (Tee bottom)
The rest of the layers are in the shear wall section
Use the traditional detailed approach to generate the interaction diagram for the concrete wall section shown above by determining the following seven control points for positive and negative moment about the y-axis:
Point 2: Bar stress near tension face equal to zero, (fs = 0)
Point 3: Bar stress near tension face equal to 0.5 fy (fs = 0.5 fy)
Point 4: Bar stress near tension face equal to fy (fs = fy)
Point 5: Bar strain near tension face equal to ɛy + 0.003
Several terms are used to facilitate the following calculations:


A complete nominal and design interaction (P-M) diagrams are shown in Figure 2 along with the key control points. The observations on the P-M diagram of an irregular wall or column sections are summarized as follows:
1. The interaction diagram for an irregular section is tilted provided that the moments are taken about the geometric centroid. This is due to the unsymmetrical geometry and/or reinforcement configuration.
2. The calculation of an interaction diagram for an irregular section follows the same procedure as a regular section, except at uniform compressive and uniform tensile strains (i.e., points 1.1-1.2 for compression and points 7.1-7.2 for tension). In these cases, the moment values become non zero, unlike the symmetrical sections, due to unsymmetrical reinforcement configuration causing a moment of steel forces about the centroid.
3. The left side of the P-M diagram shows elevated axial load capacities for all control points owing to the increased area of the concrete compression block mainly because the large wall flange is in compression including a larger reinforcement area in the flange.
4. In large cross sections with irregular geometries and/or reinforcement configurations, very high strains may be reached in the reinforcement near the tension face. This condition will be prominent in the range between pure bending control point and maximum tension control point (the strain value at maximum tension point is assumed as infinity). This may be exacerbated by low reinforcement amounts further lowering neutral axis depth which in turn results in a further increase in tensile strains at reinforcement. In such cases, engineers may review the amount of steel and revise as required to achieve what they deem reasonable to balance the steel ratio with the steel strain in tension as will be seen in this example.
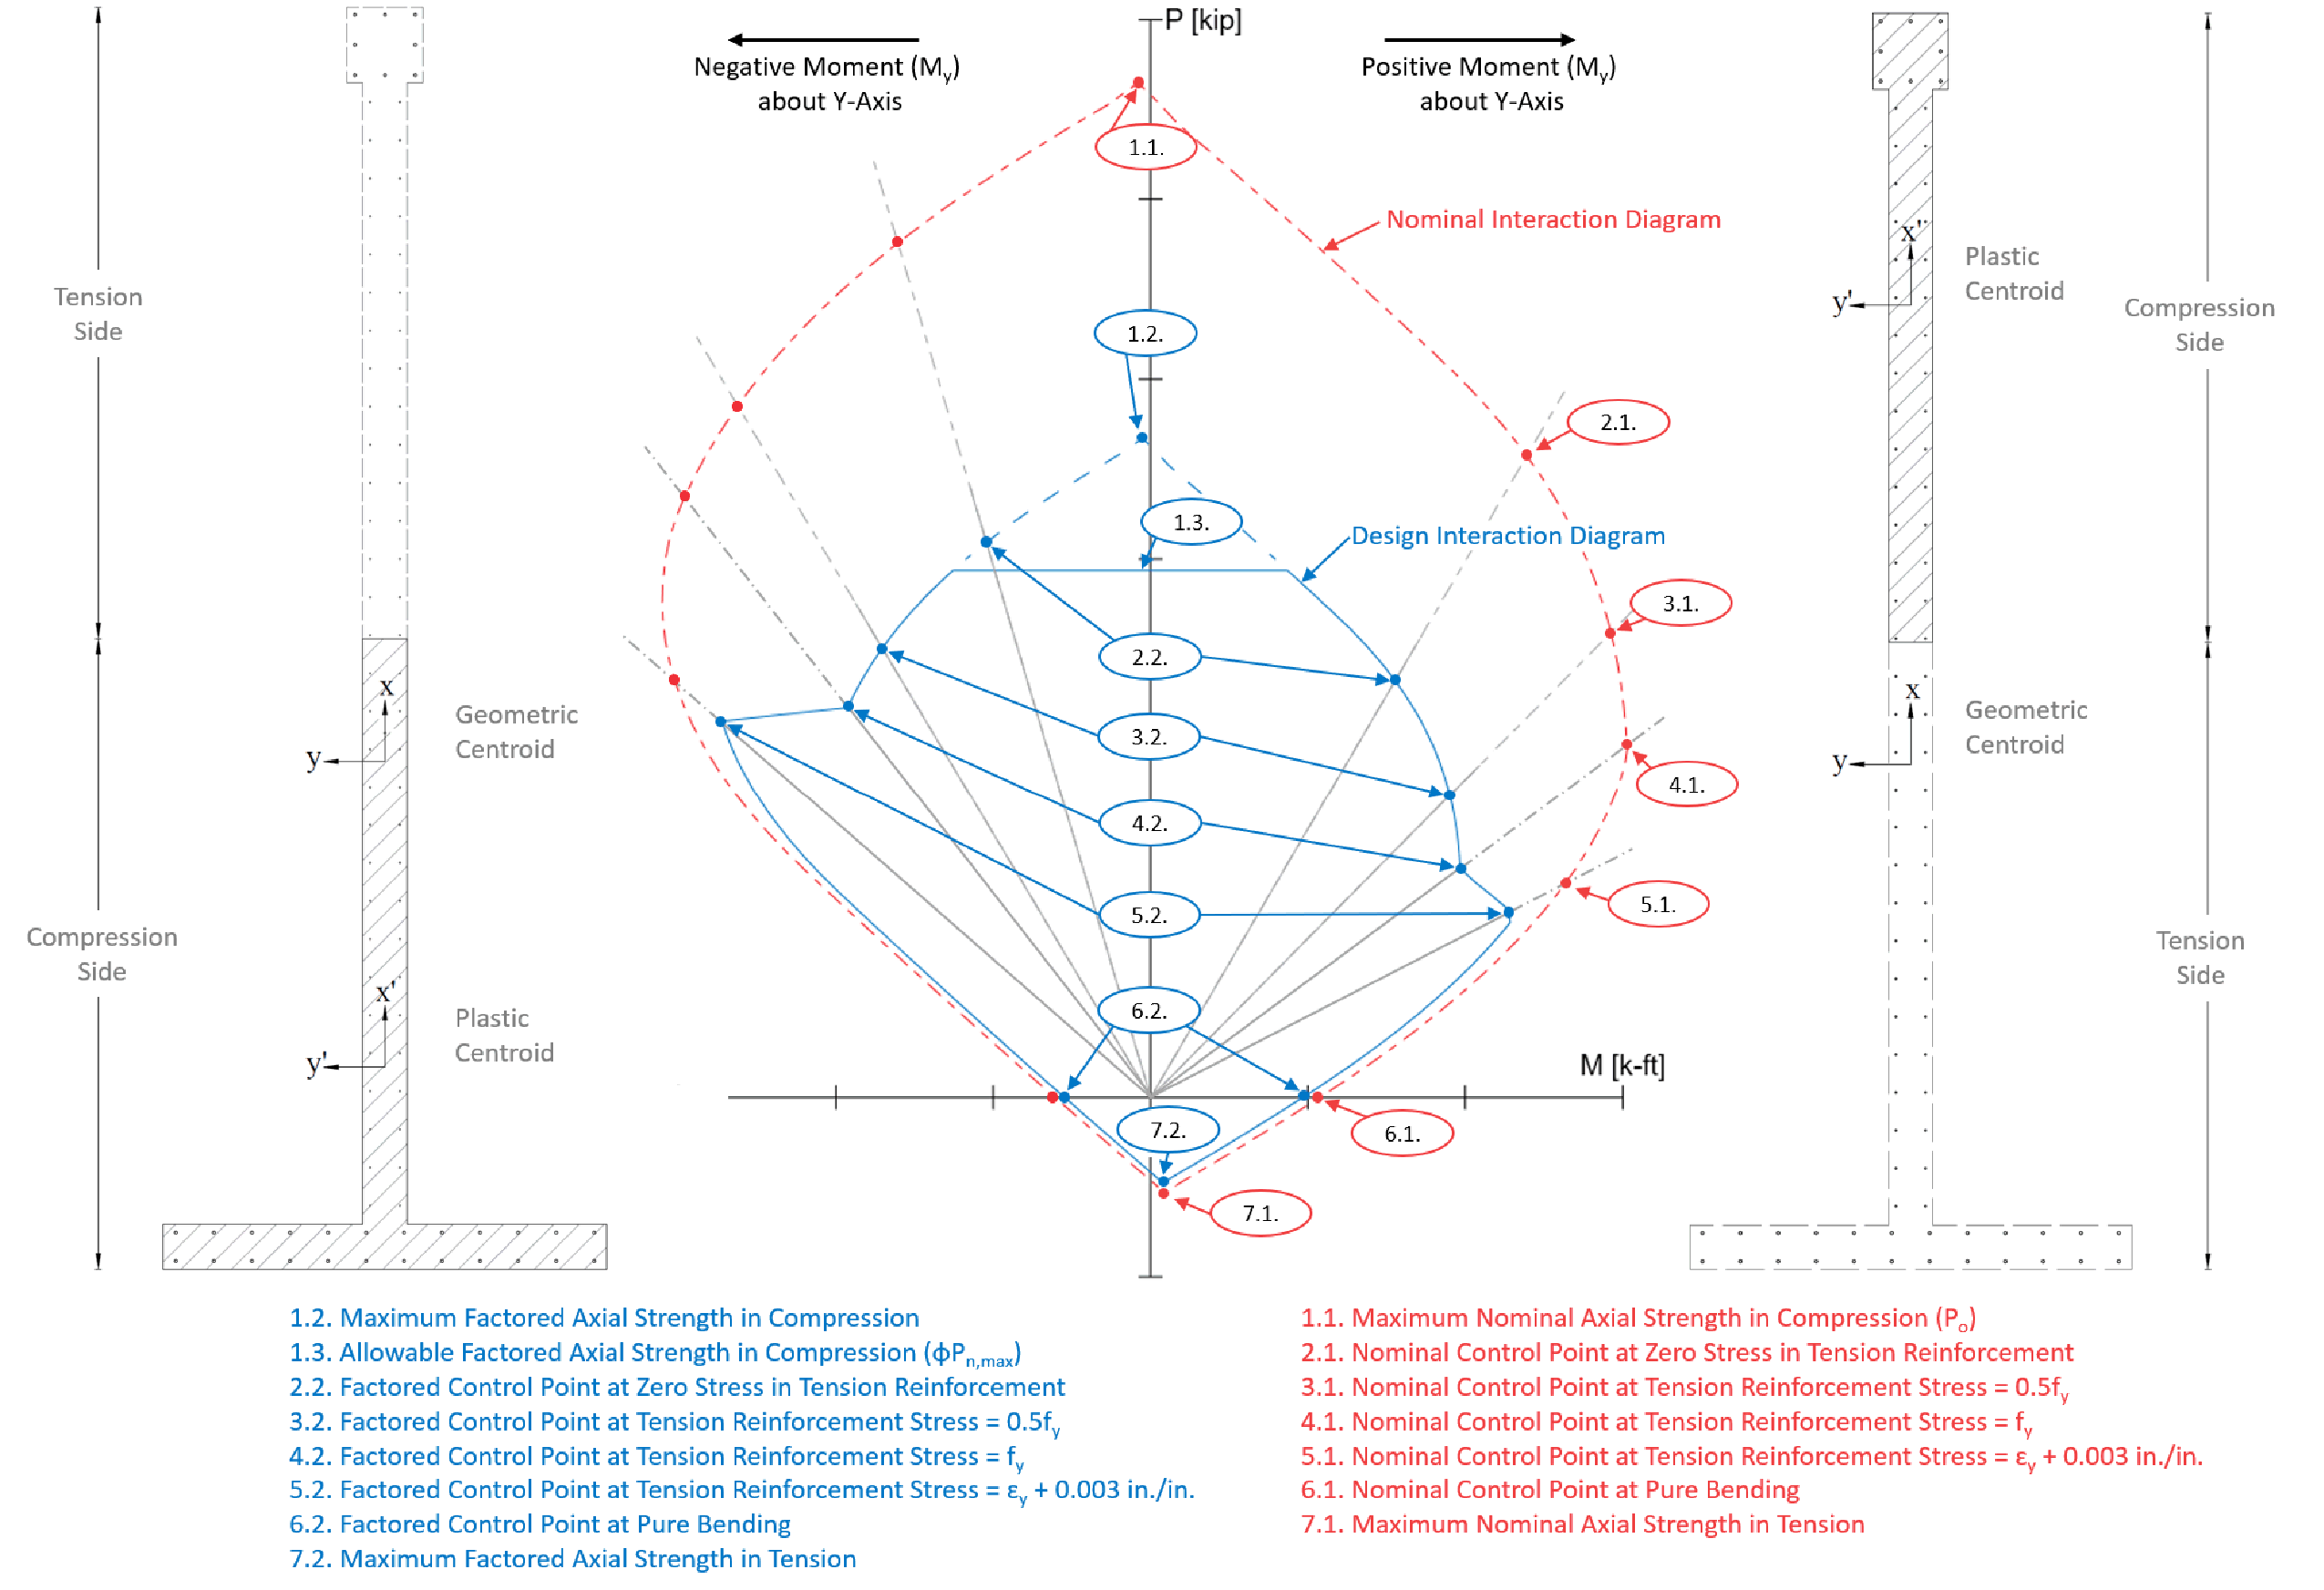
Figure 2 - Irregular Section Interaction Diagram Control Points